Showing posts with label electrical. Show all posts

Friday, June 11, 2021

How to replace the end of the shore power electrical cord

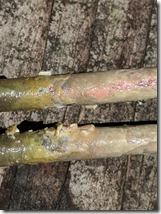
About a year ago the plastic sheathing which protects the wires inside our 50-amp shore power cable came “unattached” to the plug’s end. Knowing that this wasn’t good I did some online research and found that most people were using gorilla tape to re-attach it.

One afternoon I decided I would use some acetone to clean the wires and sheathing up real good so the tape would stick better. I applied the gorilla tape being careful to keep it flat so water couldn’t get inside the cable behind the sheathing. Using black tape the job looked almost as good as new, but would it last?

After four or five months the taped plug-in re-separated. I once again took to the internet in search of solutions. The obvious one, of course, was to simply replace the end but how difficult would that be?

Finding no other viable solutions I ordered a new one. After reading about several replacements I chose the Camco PowerGrip Replacement Plug on Amazon because of its great reviews, and I liked the large handle on the back of the plug to assist in taking it apart (especially from a 30 AMP adapter).

Once the replacement arrived through the mail it was time to put it on. I read the instructions carefully and they were very meticulous. The first task was cutting off the old end. I opted to use a hack saw with a metal cutting blade since I didn’t have a large enough wire cutter. Once the end was cut off the directions said to strip each of the old wires in a particular way:

Wire Color        How much wire  unsheathed         How much wire to strip to copper    

green                              3"                                             .75” or 3/4”
black                     1.875 or 1 7/8”                                 .625” or 5/8”
red                        1.875 or 1 7/8”                                 .625” or 5/8”
white                         1.5 or 1 1/2                                   .625” or 5/8”


Why they gave directions in decimals for the inches I have no idea because I had to convert them first. I used a box cutter to cut the sheathing down the three inches needed for the green wire and then used a wire cutter to achieve the lengths needed for each wire. Finally I used a wire stripper to strip the required amounts off of each wire’s end.

At this point one must be really careful to make sure to follow the diagram to put each wire in its rightful place. Then tighten each as much as possible. All that remained was to put the rest of the plug together and tighten the sheath collar real snug.


With the right tools this happened to be a fairly easy task in making our power cord as good as new! It was made even easier when the neighbor’s dog came by to assist…


NOTE:  We are currently in College Station, Texas until June 15th…

Tuesday, August 28, 2018

Refurbishing the RV Hot Water Heater…

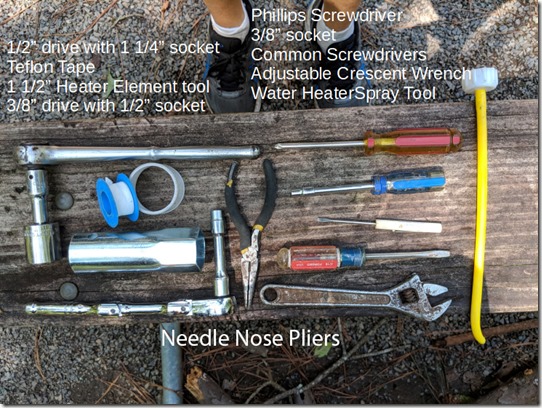
Tools Used

We had no sooner arrived in Raleigh North Carolina when we noticed we had a problem. When getting ready for a shower we couldn’t seem to get any hot water from our faucets. So in typical fashion I hit the internet and start searching for solutions to our problem.

I initially eliminated a power issue as all breakers were fine so that left me with an issue with the hot water heater itself. A new one runs nearly $500 dollars but there are a few replaceable parts which are not very expensive and will most likely fix the issue with the unit not making any hot water.

MVIMG_20180823_123128IMG_20180823_123233

After thoroughly searching the internet and reading other’s problems with their 10 gallon Suburban hot water heater (Model SW10DE)  I came to the conclusion that the problem was one of three items. The three most likely components which may have failed were the heating coil, the thermostat and the electrical on/off switch. While there are ways to test each of these using an ohm meter for shorts, as cheap as these three items were (under $50), I decided to simply order all three to refurbish the hot water heater. After all it is 11 years old. I also had a anode rod from before so I will replace it too while working on the unit if needed.

Working on the unit required a few tools as pictured in the header photo. First things first - power was turned off of the water heater (both gas and electric) and as an added precaution the entire RV because I hate electrical surprises… With the power off the next thing to do was to shut off the water to the RV. Next I turned I turned on the faucets inside to release all the water pressure. To get to the water heater I have an outside panel I removed to gain access to the anode rod. I removed this using a 1 1/4” socket on a half inch drive. With the rod removed the water would drain out completely. My anode rod was only about 25% dissolved so I decided to keep using it and save the new one for a later replacement.

MVIMG_20180823_123921IMG_20180823_134127

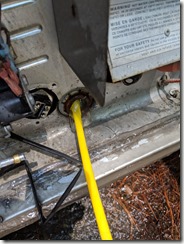
With the water heater anode rod out I attached the water heater spray tool to a hose and used it to rinse out the inside of the hot water heater. I inserted the end of the sprayer tool into the hole left by the anode rod removal. I made sure to aim it up, down and all around to remove a lot of “stuff” which was mostly hard water deposits and anode rod pieces. Afterward I put the anode rod back after putting some Teflon tape on the screw edges to ensure it won’t leak after tightened down. I should mention that I didn’t elect to replace my Suburban Pressure Relief Valve since it seemed fine (photo – above right).

MVIMG_20180823_134107MVIMG_20180823_133827

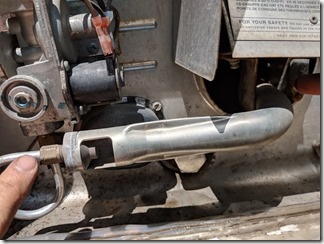
Next I needed to remove a piece of the gas protective tubing in front of where the heater element is. These connections don’t have any pressurized gas in them so it was entirely safe to remove the piece by removing one nut and unscrewing the other end (see above photos). With this piece removed I took out the three 3/8” hex-screws holding in the cover for the heating element (see picture below left) and then removed the two wire leads by using a Phillips screwdriver. With the leads out of the way I used a 1 1/2” heater element socket to remove the old element. I had to do so to get the element out as it is slightly recessed – see picture below right (item on right is element and on right is anode rod).

MVIMG_20180823_134122MVIMG_20180823_131552

The old element looked okay but was heavily crusted with calcium deposits (photo below left). Some of the deposits had even bridged across the element so I opted to put in the new one. I replaced the heating element by simply reversing how I uninstalled it. I made sure to use some Teflon tape on the threads before tightening this item too. With the heating element replaced I moved on to the next item.

IMG_20180823_124657MVIMG_20180823_124621IMG_20180823_124911

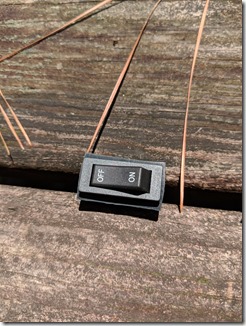
The on/off electrical switch I had was very hard to switch on and off so it too would be replaced. It was easy to remove using a flat head screwdriver to slowly and gingerly pry the switch up. It had some small tabs securing it in place and once I had the switch lifted enough it slid out. Then I used a pair of needle nose pliers to remove the wires one at a time and put them on the new switch making sure to put the wires in the proper order. I pushed the switch back in place and this task was done.

MVIMG_20180823_131809MVIMG_20180823_124956

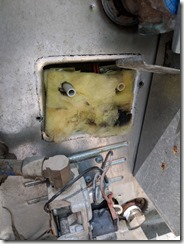
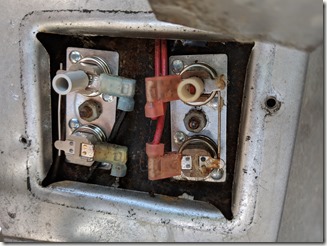
Lastly I unscrewed the two 3/8” hex-screws from the thermostat cover and the first thing I noticed was a burnt char on the insulation behind the cover. Lifting out the insulation exposed a burnt contact on the thermostat. This was definitely bad. One nut in the center held it in place and using a 3/8” socket I removed the thermostat and put the new one in making sure to put the plastic tube in as well as it is how the unit can be manually reset. I pushed the wire leads back on the new unit, put the nut back on and screwed on the cover to finish the job.

MVIMG_20180823_134125IMG_20180823_133153

MVIMG_20180823_125831MVIMG_20180823_131557

I turned on the electricity and water, then waited until all the air in the lines was purged. Once the inside faucets stopped “burping” and water flowed from both the hot and cold water sides I turned on the hot water heater and water for about 15 to 20 minutes to see if it all worked well. Success!  We now have hot water again and we won’t need to worry about the hot water heater for a while….

NOTE: We are now in Raleigh NC at Jordan Lake Campgrounds to attend some pre-wedding parties for our daughter and after Labor Day we will stay at the Outer Banks for a while before returning back to Raleigh NC…

Thursday, April 21, 2011

Wiring up the toad…

Well as you may remember when we started this journey over a month ago we were not able to tow our Honda CRV since we were missing some parts. We finally got the parts needed to finish being able to hook up the toad. Yes!!!! So I got up early one morning to get all the parts out and make sure we would be able to tow the CRV the next time we are ready to leave.

100_4468    100_4459

I had previously installed the Roadmaster base plate on our new Honda CR-V. That task takes about 3.5 hours and requires minimal cutting on the front fascia of the CRV. The parts I was initially missing were the quick disconnects that we had to order from Roadmaster . Once these parts arrived we finally had everything we needed to mechanically tow the CRV, or did we?. Because now we had to hook of the electrical side of the equation.

100_4470                     100_4469

To install the Roadmaster Universal Light Kit we were going to need to run the lighting wires underneath the car and along the brake lines and support beams on the driver’s side until we could run the wires up into the rear quarter panel to the rear lights. I couldn’t find an easy way into the interior via the firewall so I chose the outside and under approach. Snaking the wire under the car was best done by feeding in through the hollow support steel from below where possible and feeding the wire rear wards making sure to avoid any possible areas that might compress the wires or put them too near the exhaust system (don’t want them melted).

100_4573                        100_4574

Snaking the wires from front to back will take a good hour if you are meticulous and have to redo parts of it like I did ; ) … But once this part was done I was able to determine which lights lit up when the turn signal, brakes and lights were used. I used a sharpie to mark inside the plastic what each light did. Now the universal kit didn’t have everything I needed so I had to order two additional diodes (which I had ordered after ordering the light kit).  The additional diodes are necessary for me since both my CRV and motorhome have separate lights for turn signals, breaks and lights. Wiring the diodes in place wasn’t as bad as I thought it would be.

100_4572After splicing in all six of the diodes I had my wife watch the lights as I retested everything and all seemed to work like they was supposed to. Looks like I didn’t screw anything up :) !!! So all I need to do is attach the 4 flat-to-4 round adapter I bought to the 4 round-to-7 round pigtail I have for the motorhome attachment point and we can test the motorhome. But alas, I still need another part as both of my 4 round adapters are female… so even thought I thought I had ordered all the parts I will still need at least one more…

100_4464

The rest of this story will have to wait till I find the additional part…