Showing posts with label plumbing. Show all posts

Wednesday, May 5, 2021

Replacing the Bathroom Faucet in the RV…


As with a sticks and bricks home,  in an RV as it ages things wear out and need to be replaced. Sharon wanted me to replace our bathroom faucet for some time but being the frugal guy I am I just didn’t want to since it worked fine.

I did agree it looked a bit worn but it worked so I figured why replace it. Well several months after she mentioned replacing it it started to leak just a little bit around its base. I couldn’t discern where it was leaking so I gave in and decided it needed to be replaced. I mean after all it was broken now, right?


As many of you know there is little pleasure in doing plumbing in a house. Well, there is less pleasure in doing it in an RV. Why? Two reasons… One is RV’s are all Pex! While it makes it easy for builders of RVs to put in all the plumbing as it is more flexible than rigid pipes, it becomes a pain in the butt to work with later.

Here is my biggest gripe about working with Pex. In order to connect Pex pieces together you need a special tool. No biggie, right? Well this special tool is over $100.00 and it is a big tool which will then need to be stored. However, there is a solution!

You can plumb with Pex without the tool but you have to buy specialized plumbing connectors called “Shark Bites.” These babies are really nifty in making Pex plumbing practically a snap, notice I said practically.


So the other reason this job was a pain other than having to work with Pex, our faucet had two handles and three holes for the faucet to fit into on the countertop. It had a unique attachment to make it affix to the counter. When searching high and low for a replacement it took me a good while until I figured out any faucet would work as long as it had three holes, a pull to lift the sink stopper up and it had long enough threaded parts to go through the countertop so I could secure it firmly to the countertop.


I finally settled on a stylish Delta faucet Sharon liked and surprisingly it went in with little pain. After removing the old faucet by cutting the Pex lines (they are red and blue for hot/cold) I bought Shark Byte connectors to attach the new one. Instead of a simple union connector I spent a little more money for the Shark Bite shut off valve so in the future I could turn the hot and/or cold water off under the sink.


If you haven’t worked with Shark Bites before they are a blessing for weekend plumbers working with Pex. Once you have a cleanly cut end of the old Pex you simply slide the Shark Bite onto the Pex until it won’t slide on anymore and it is on there baby! Once on, I attached a normal braided flexible water line from the shut off valve to the new faucet. I have to admit this was the easiest plumbing job I have ever done.


I did wait to brag about how easy it was for at least a month before I blogged about it just in case it failed…. it didn’t. I am sure when Sharon returns from North Carolina she will love her new, much more modern bathroom sink faucet!

NOTE:  While Sharon is in North Carolina I am currently at Angler’s Retreat in Rockport Texas until  May 12th…

Sunday, April 25, 2021

Awning and Plumbing Repairs…

Well, with Sharon away in North Carolina, it finally became time to do a couple of repairs on the RV I have been putting off for some time. As long time readers know I replaced all our slide topper awnings about three years ago during a winter stay in Florida.


This year while wintering down in the Rio Grande Valley I noticed that one of our new slide toppers was showing signs of damage which of course shouldn’t have so soon. Upon further inspection it was seemingly coming apart and appearing as if it were about 15 years old. I contacted Tough Top Awnings whom I purchased them from and told them my story.


After hearing my dilemma they said there was no way these toppers should have failed and it must have been defective material. They therefore agreed to simply send me a new one at no charge as there was a five year warranty on them. Nice, but now I have to put it on. Last time I did this I had help from a friend (Ed) and I sure found myself wishing he was here. I did manage to get the new one on but I can tell you that doing it by myself was not nearly as easy as having help.


With that task out of the way another non-pleasant task awaited me which was a water leak problem. Water was slowly bypassing our city water valve and as such would slowly fill up our fresh water tank only to eventually trickle out of the overflow cap.

After scouring the web I thought it was a faulty check valve in our water pump so I ordered an inline one to bypass the one in the water pump since it was harder to replace. It took less than half an hour to do this but alas, it wasn’t the problem. It turns out the problem was the city water diverter valve. Fortunately Amazon also had one of those.

With the water turned off and the fresh water tank drained I was ready to start. This was certainly not going to be an easy task. Simply getting to this valve was a chore as all of the plumbing and connections on the face panel had to be removed to get to it. Once the valve was exposed I could cut it out. Since everything is pex I used my pex cutter which I had from replacing our hot water heater. 


Once it was out I still needed to take off all the fitting attached to the old valve since the new one didn’t include them. Then I reattached the old connections to our new valve so it was ready to install. I needed several shark byte connections to complete this task. I used a few unions and a “T” connection to complete the task. Once it was all back together I crossed my fingers for no leaks.


Hooray for no leaks! This was not an easy task and one I hope to never need to do again but it did solve our problem. Now it’s back to fishing and birding in the gulf coast of Texas…

NOTE:  While Sharon is in North Carolina I am currently at Angler’s Retreat in Rockport Texas until at least mid May…


Tuesday, August 28, 2018

Refurbishing the RV Hot Water Heater…

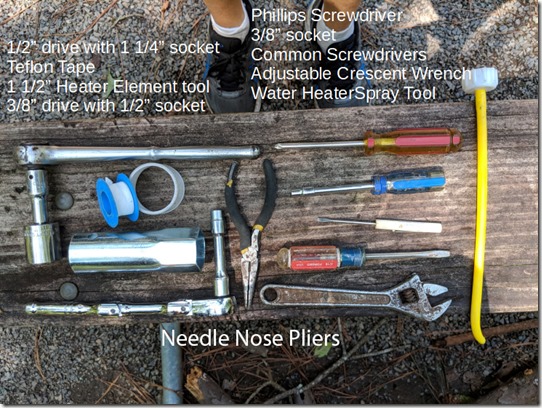
Tools Used

We had no sooner arrived in Raleigh North Carolina when we noticed we had a problem. When getting ready for a shower we couldn’t seem to get any hot water from our faucets. So in typical fashion I hit the internet and start searching for solutions to our problem.

I initially eliminated a power issue as all breakers were fine so that left me with an issue with the hot water heater itself. A new one runs nearly $500 dollars but there are a few replaceable parts which are not very expensive and will most likely fix the issue with the unit not making any hot water.

MVIMG_20180823_123128IMG_20180823_123233

After thoroughly searching the internet and reading other’s problems with their 10 gallon Suburban hot water heater (Model SW10DE)  I came to the conclusion that the problem was one of three items. The three most likely components which may have failed were the heating coil, the thermostat and the electrical on/off switch. While there are ways to test each of these using an ohm meter for shorts, as cheap as these three items were (under $50), I decided to simply order all three to refurbish the hot water heater. After all it is 11 years old. I also had a anode rod from before so I will replace it too while working on the unit if needed.

Working on the unit required a few tools as pictured in the header photo. First things first - power was turned off of the water heater (both gas and electric) and as an added precaution the entire RV because I hate electrical surprises… With the power off the next thing to do was to shut off the water to the RV. Next I turned I turned on the faucets inside to release all the water pressure. To get to the water heater I have an outside panel I removed to gain access to the anode rod. I removed this using a 1 1/4” socket on a half inch drive. With the rod removed the water would drain out completely. My anode rod was only about 25% dissolved so I decided to keep using it and save the new one for a later replacement.

MVIMG_20180823_123921IMG_20180823_134127

With the water heater anode rod out I attached the water heater spray tool to a hose and used it to rinse out the inside of the hot water heater. I inserted the end of the sprayer tool into the hole left by the anode rod removal. I made sure to aim it up, down and all around to remove a lot of “stuff” which was mostly hard water deposits and anode rod pieces. Afterward I put the anode rod back after putting some Teflon tape on the screw edges to ensure it won’t leak after tightened down. I should mention that I didn’t elect to replace my Suburban Pressure Relief Valve since it seemed fine (photo – above right).

MVIMG_20180823_134107MVIMG_20180823_133827

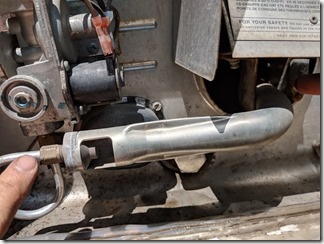
Next I needed to remove a piece of the gas protective tubing in front of where the heater element is. These connections don’t have any pressurized gas in them so it was entirely safe to remove the piece by removing one nut and unscrewing the other end (see above photos). With this piece removed I took out the three 3/8” hex-screws holding in the cover for the heating element (see picture below left) and then removed the two wire leads by using a Phillips screwdriver. With the leads out of the way I used a 1 1/2” heater element socket to remove the old element. I had to do so to get the element out as it is slightly recessed – see picture below right (item on right is element and on right is anode rod).

MVIMG_20180823_134122MVIMG_20180823_131552

The old element looked okay but was heavily crusted with calcium deposits (photo below left). Some of the deposits had even bridged across the element so I opted to put in the new one. I replaced the heating element by simply reversing how I uninstalled it. I made sure to use some Teflon tape on the threads before tightening this item too. With the heating element replaced I moved on to the next item.

IMG_20180823_124657MVIMG_20180823_124621IMG_20180823_124911

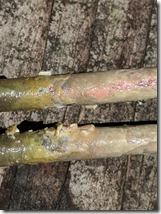
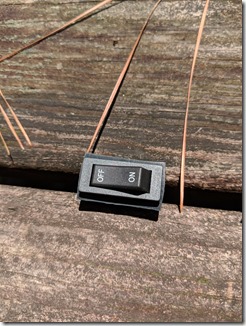
The on/off electrical switch I had was very hard to switch on and off so it too would be replaced. It was easy to remove using a flat head screwdriver to slowly and gingerly pry the switch up. It had some small tabs securing it in place and once I had the switch lifted enough it slid out. Then I used a pair of needle nose pliers to remove the wires one at a time and put them on the new switch making sure to put the wires in the proper order. I pushed the switch back in place and this task was done.

MVIMG_20180823_131809MVIMG_20180823_124956

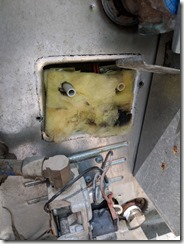
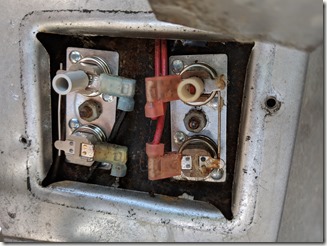
Lastly I unscrewed the two 3/8” hex-screws from the thermostat cover and the first thing I noticed was a burnt char on the insulation behind the cover. Lifting out the insulation exposed a burnt contact on the thermostat. This was definitely bad. One nut in the center held it in place and using a 3/8” socket I removed the thermostat and put the new one in making sure to put the plastic tube in as well as it is how the unit can be manually reset. I pushed the wire leads back on the new unit, put the nut back on and screwed on the cover to finish the job.

MVIMG_20180823_134125IMG_20180823_133153

MVIMG_20180823_125831MVIMG_20180823_131557

I turned on the electricity and water, then waited until all the air in the lines was purged. Once the inside faucets stopped “burping” and water flowed from both the hot and cold water sides I turned on the hot water heater and water for about 15 to 20 minutes to see if it all worked well. Success!  We now have hot water again and we won’t need to worry about the hot water heater for a while….

NOTE: We are now in Raleigh NC at Jordan Lake Campgrounds to attend some pre-wedding parties for our daughter and after Labor Day we will stay at the Outer Banks for a while before returning back to Raleigh NC…

Monday, December 1, 2014

How to Replace a RV Kitchen Faucet and Drain…

Ocean Beach CA 022

I have always enjoyed being handy around the home. When we had our sticks and bricks house I tackled just about everything including electrical, plumbing and even remodeled our kitchen by extending it about five feet (a major undertaking). My least favorite task is anything that involves plumbing so when we finally decided it was time to replace our rusting and crumbling RV kitchen faucet I knew it wouldn't be as easy as it should be… It is my hope that by sharing how I did it, it may help someone else planning to do a similar replacement.

I chose to replace our Moen kitchen faucet with a Dura Faucet I found on Amazon. I knew when shopping for a replacement it is important to make sure to get one of the same configuration (mine was a one holer).  I also hoped to spend under $175.00 for the faucet and all the other stuff I would need for replacing it.

My first step was to ensure the water was off and to bleed the water pressure by opening the faucet up. I like to open more than one faucet to make sure there will be no wet surprises. Most RV’s won’t have much space under the sink to get to the plumbing so it may be tricky getting to the connections. The first thing I did was to disconnect the water supply lines from the old faucet. Mine are color coded so I can tell hot (red) from cold (blue) but if yours aren’t, I would label them somehow to make sure you are able to reattach each water line to the correct side. A small bowl will be needed to catch the water that will bleed out from the disconnected water lines.


Next I disconnected our sprayer hose and used a bowl to capture any water spillage from it as well. With all the hoses disconnected the next task was to remove the retaining nut holding the faucet to the countertop. This large nut has protruding tabs that can usually be loosened by hand pressure alone.  This is usually hard to get at and fortunately for me mine was able to be loosened without any special tools. With the nut removed the faucet was free to be lifted away from the counter. Of course the copper lines feeding down from the old faucet had to be bent in such a fashion as to pull them through the hole in the sink. I likre that the new faucet doesn’t have copper lines as they are replaced with more RV forgivable flex hoses.

Installation is supposed to be as simple a doing the same as the disassembly, only in reverse order. 

Some tips I would suggest during installation:

  • A layer of plumbers putty between the faucet fixture and the counter will make sure water doesn’t leak under the countertop. Plumbers putty is like clay or play-do that you can roll into a thin rope to apply to the base of the faucet.
  • Use Teflon on all connections and make sure you wrap the tape in the “tighten thread” direction. This stuff is a plumbers saver and helps ensure non-leaking connections…
  • Our faucet is one hole faucet but yours may be a two or even a three hole faucet set up. Just count the holes in your sink after the faucet is removed and you will know what to look for in its replacement.
  • Make sure your replacement faucet has an adaptor plate which covers the existing holes in the sink where the other water feeds came through. Ours didn’t require any plate but yours may.
  • A special tool you may need is a basin wrench for untightening the large nut on the faucet. I didn’t need this tool but you may. If so make sure there is room under the sink to use the one you buy.
  • Check the connections of your new faucet to ensure you won’t need any adapters to connect up to your existing cold/hot water feeds.
  • If you can’t loosen the large nut from the faucet you may need to remove the sink first which may be an easier option.
  • If needed replace the sink drain at the same time which is what I did.

The biggest pain in the butt for me was removing the old sink drains from our double sided sink. There is a large retaining ring under the sink that holds the drain in place secure to the sink. I bought a sink drain wrench to assist in removing the retaining rings. One was easily removed however one wouldn’t budge no matter how hard I tried. I had to use a metal drill bit and drilled holes all along the retaining ring so I could split it along the side to remove it. It seems there is always a gotcha when dealing with plumbing often requiring some improvising even when you think you have all the right tools. The sink drain wrench is needed though for tightening the new retaining ring up to secure the drain. Before putting the new drain in make sure to clean the sink and make sure it is dry. A thin rope of plumbers putty is needed around the rim of the drain before tightening it down. This putty makes sure your drain doesn’t leak. Jus tighten it enough to make the putty ooze out on all sides. Just scrape away any remaining putty and you have your new drain installed.

All in all the task only took about 2.5 hours to complete. Of course it took an additional 2 hours driving time going back and forth to Lowes to get all the small items I ended up needing. One last note is I should have replaced the caulk around the sink while the faucet was out instead of after it was in as it would have been much easier and neater. The job was not fun but saved us a few bucks and I only bled once during the installation…