
We had no sooner arrived in Raleigh North Carolina when we noticed we had a problem. When getting ready for a shower we couldn’t seem to get any hot water from our faucets. So in typical fashion I hit the internet and start searching for solutions to our problem.
I initially eliminated a power issue as all breakers were fine so that left me with an issue with the hot water heater itself. A new one runs nearly $500 dollars but there are a few replaceable parts which are not very expensive and will most likely fix the issue with the unit not making any hot water.


After thoroughly searching the internet and reading other’s problems with their 10 gallon Suburban hot water heater (Model SW10DE) I came to the conclusion that the problem was one of three items. The three most likely components which may have failed were the heating coil, the thermostat and the electrical on/off switch. While there are ways to test each of these using an ohm meter for shorts, as cheap as these three items were (under $50), I decided to simply order all three to refurbish the hot water heater. After all it is 11 years old. I also had a anode rod from before so I will replace it too while working on the unit if needed.
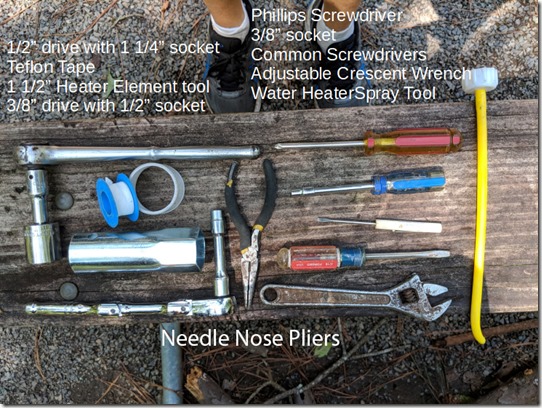
Working on the unit required a few tools as pictured in the header photo. First things first - power was turned off of the water heater (both gas and electric) and as an added precaution the entire RV because I hate electrical surprises… With the power off the next thing to do was to shut off the water to the RV. Next I turned I turned on the faucets inside to release all the water pressure. To get to the water heater I have an outside panel I removed to gain access to the anode rod. I removed this using a 1 1/4” socket on a half inch drive. With the rod removed the water would drain out completely. My anode rod was only about 25% dissolved so I decided to keep using it and save the new one for a later replacement.
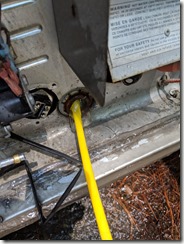

With the water heater anode rod out I attached the water heater spray tool to a hose and used it to rinse out the inside of the hot water heater. I inserted the end of the sprayer tool into the hole left by the anode rod removal. I made sure to aim it up, down and all around to remove a lot of “stuff” which was mostly hard water deposits and anode rod pieces. Afterward I put the anode rod back after putting some Teflon tape on the screw edges to ensure it won’t leak after tightened down. I should mention that I didn’t elect to replace my Suburban Pressure Relief Valve since it seemed fine (photo – above right).
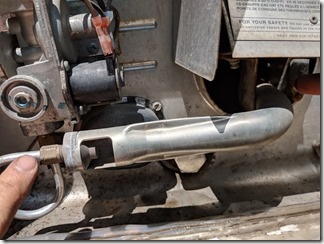

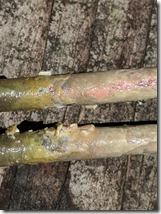
Next I needed to remove a piece of the gas protective tubing in front of where the heater element is. These connections don’t have any pressurized gas in them so it was entirely safe to remove the piece by removing one nut and unscrewing the other end (see above photos). With this piece removed I took out the three 3/8” hex-screws holding in the cover for the heating element (see picture below left) and then removed the two wire leads by using a Phillips screwdriver. With the leads out of the way I used a 1 1/2” heater element socket to remove the old element. I had to do so to get the element out as it is slightly recessed – see picture below right (item on right is element and on right is anode rod).


The old element looked okay but was heavily crusted with calcium deposits (photo below left). Some of the deposits had even bridged across the element so I opted to put in the new one. I replaced the heating element by simply reversing how I uninstalled it. I made sure to use some Teflon tape on the threads before tightening this item too. With the heating element replaced I moved on to the next item.


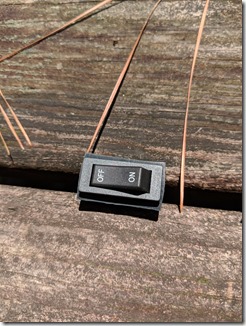
The on/off electrical switch I had was very hard to switch on and off so it too would be replaced. It was easy to remove using a flat head screwdriver to slowly and gingerly pry the switch up. It had some small tabs securing it in place and once I had the switch lifted enough it slid out. Then I used a pair of needle nose pliers to remove the wires one at a time and put them on the new switch making sure to put the wires in the proper order. I pushed the switch back in place and this task was done.

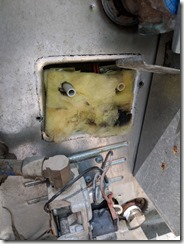
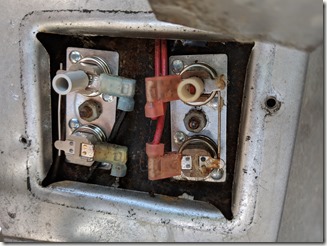
Lastly I unscrewed the two 3/8” hex-screws from the thermostat cover and the first thing I noticed was a burnt char on the insulation behind the cover. Lifting out the insulation exposed a burnt contact on the thermostat. This was definitely bad. One nut in the center held it in place and using a 3/8” socket I removed the thermostat and put the new one in making sure to put the plastic tube in as well as it is how the unit can be manually reset. I pushed the wire leads back on the new unit, put the nut back on and screwed on the cover to finish the job.


I turned on the electricity and water, then waited until all the air in the lines was purged. Once the inside faucets stopped “burping” and water flowed from both the hot and cold water sides I turned on the hot water heater and water for about 15 to 20 minutes to see if it all worked well. Success! We now have hot water again and we won’t need to worry about the hot water heater for a while….
NOTE: We are now in Raleigh NC at Jordan Lake Campgrounds to attend some pre-wedding parties for our daughter and after Labor Day we will stay at the Outer Banks for a while before returning back to Raleigh NC…


